How to Create a Home Inventory You Can Actually Use
A home inventory is a detailed record of the belongings in your house or apartment. It can help you remember what you owned, organize supporting documents, and describe losses more clearly after a fire, theft, or other emergency. The challenge is not understanding why a list matters. It is creating one that is complete enough to be useful without turning the project into an exhausting catalog of every object you have ever purchased.
The best system is practical, repeatable, and stored somewhere you can reach even if you cannot enter your home. You do not need specialized equipment. A phone camera, a basic spreadsheet or inventory app, and a secure place for digital copies are enough to begin.
Start with a simple structure
Choose one room and finish it before moving to the next. Starting with a contained space, such as a bathroom or entryway, builds momentum and helps you settle on a recording method. Trying to document the entire home in one session often leads to rushed descriptions and abandoned work.
Create consistent fields for each entry. A useful record may include:
- Item name and short description
- Brand, model, or distinguishing features
- Serial number, when available
- Approximate purchase date
- Purchase price or estimated original cost
- Receipt, invoice, or order confirmation
- Photo or short video
- Room or storage location
Work room by room
Use a logical route through the property and include areas that are easy to forget: closets, cabinets, a basement, attic, garage, shed, balcony storage, and off-site storage units. Open drawers and doors while recording so the inventory captures belongings that are not normally visible.
For each room, begin with wide photos from several angles. These establish context and show how items were arranged. Then take close-ups of valuable objects, labels, model plates, and serial numbers. If you use video, move slowly, keep the room well lit, and describe important items aloud. A fast sweep may look efficient but can produce blurry footage that reveals little when reviewed.
Group ordinary items when individual entries would add little value. Instead of listing every plate, describe a dinnerware set and photograph the complete group. Clothing can be summarized by type and approximate quantity, while unusually valuable pieces can receive separate entries. The goal is an accurate record, not unnecessary paperwork.
Capture evidence that identifies the item
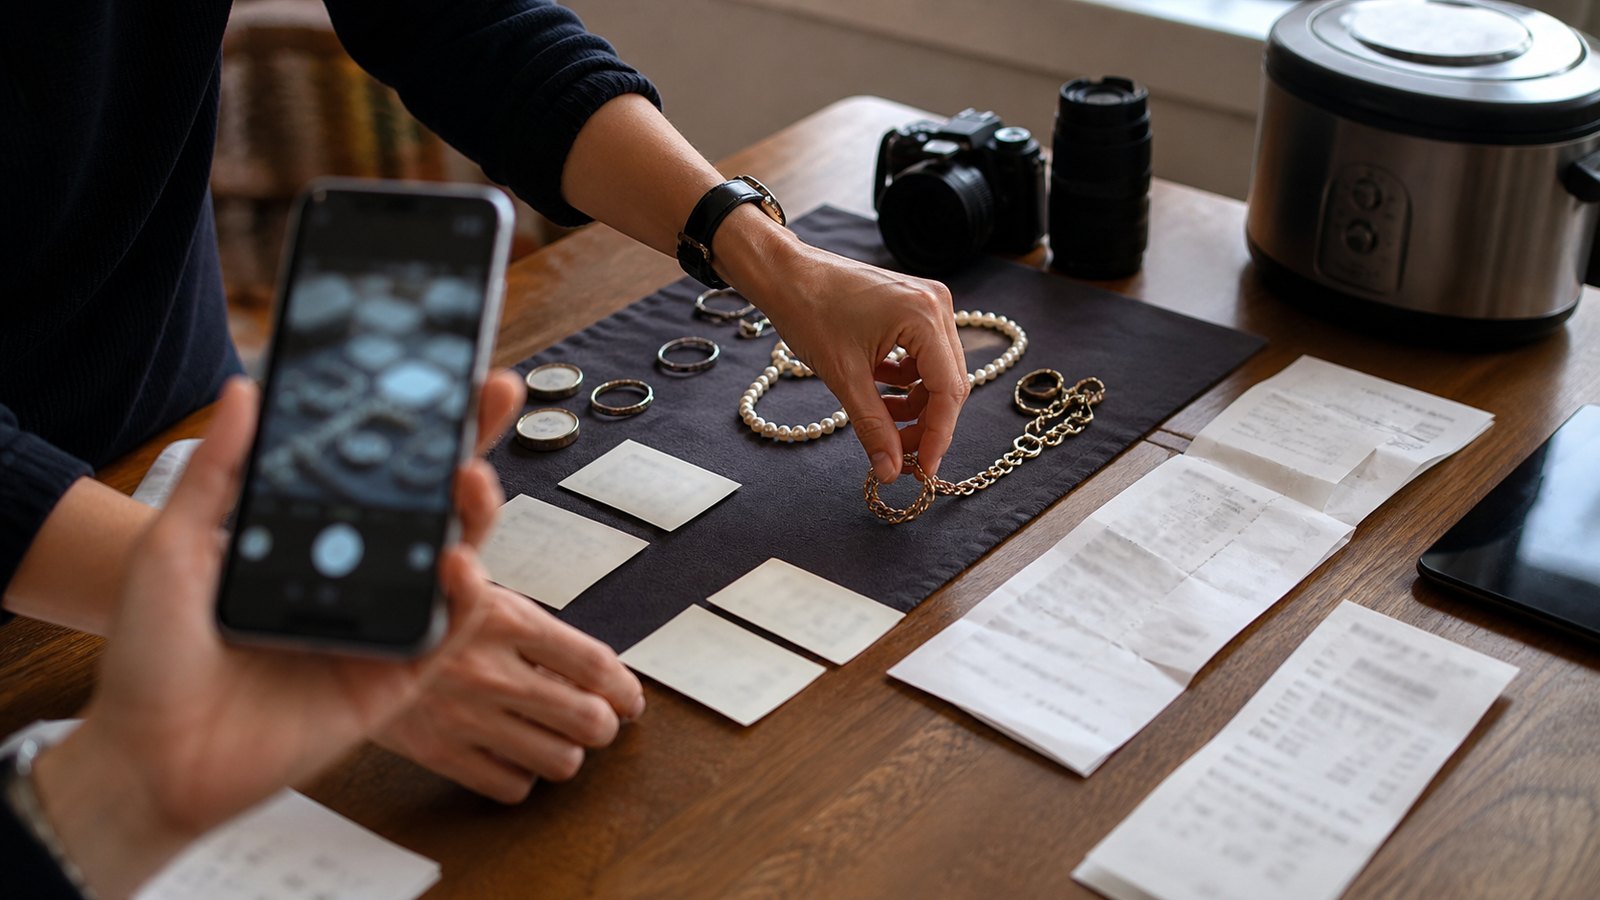
A photograph proves more when it contains useful detail. Include the full item, then capture the manufacturer label, serial number, or unique feature separately. For electronics, appliances, tools, and bicycles, check the back, underside, door frame, battery compartment, or original packaging for identifying information.
Receipts are helpful, but they are not the only evidence. Save digital invoices, warranty registrations, manuals, appraisal documents, and confirmation emails. If the original receipt has faded, scan or photograph it now. Name files consistently so they can be matched to inventory entries without guesswork. For example, a file name that includes the room, item, and year is easier to understand than an automatic camera number.
Decide how much detail is enough
Prioritize items that would be expensive, difficult, or emotionally stressful to replace. These often include major electronics, appliances, furniture, tools, sports equipment, musical instruments, jewelry, art, collections, and work equipment. Renters should document their belongings too; the building owner’s records do not describe a tenant’s personal property.
Do not ignore everyday goods. Kitchen equipment, linens, shoes, books, toys, and basic furniture can represent a substantial replacement task when considered together. Category summaries, supported by room photos, are a reasonable way to record these objects without creating hundreds of tiny entries.
Create a separate note for pairs and sets. Photograph all components together and record missing pieces. For furniture, include the material, approximate dimensions, and any maker’s label. For custom items, save the order confirmation or design specification so the record explains what makes the item different.
Avoid guessing when you can verify. Check an old order history, email receipt, bank record, manual, or product label. When an exact purchase date or cost is unavailable, mark the value as approximate. A transparent estimate is more useful than false precision.
Store copies away from the property
An inventory that exists only on a computer or paper folder inside the home can disappear in the same emergency as the belongings it documents. Keep at least one copy in a separate, protected location. Options include encrypted cloud storage, a secure digital vault, or an external drive kept outside the property. A trusted person may also hold an encrypted copy if that arrangement fits your needs.
Protect the inventory because it contains sensitive information about what you own. Use a strong, unique password for the storage account, enable multifactor authentication when available, and limit sharing permissions. Do not place unprotected copies on a publicly accessible link. If you keep paper records, store them in a secure location and make a separate digital backup.
Test access after saving the files. Confirm that photos open, videos play, documents are readable, and the spreadsheet or app can be exported. Record the recovery information for the storage account securely. A backup is only useful if you can retrieve it during a stressful situation.
Connect the inventory to fire preparedness
Documentation supports recovery, but prevention and escape planning come first. Make sure your household has working smoke alarms, a practiced escape plan, and two possible ways out of each room when feasible. Everyone should know where to meet outside and understand that once they escape a fire, they should stay outside and call emergency services.
Keep the inventory process separate from hazardous behavior. Never delay evacuation to collect receipts, devices, or valuables. Records are replaceable; people are not. Store emergency contacts and essential policy information where household members can reach them without searching through the property.
Maintain the record without starting over
Set a manageable update schedule. Review the inventory once a year and after major purchases, moves, renovations, or changes in household members. Add a new item when you buy it instead of waiting for the annual review. Saving a receipt and two photographs immediately usually takes less time than reconstructing the details later.
Use a brief maintenance checklist:
- Add significant purchases and gifts.
- Remove items sold, donated, or discarded.
- Update appraisals and identifying information.
- Check that backups still open.
- Confirm account recovery and security settings.
- Review insurance questions with a qualified professional.
Date each revision so you know which copy is current. If several household members contribute, assign one person to consolidate changes and avoid conflicting versions. Export a fresh copy after every substantial update.
A realistic one-week plan
Break the job into short sessions. On day one, create the template and choose secure storage. On the next several days, document one or two rooms at a time. Reserve a separate session for garages, closets, and stored valuables. Finish by organizing receipts, checking file access, and noting any questions for your insurer.
Do not postpone the project because the first version will be imperfect. A basic set of room photos and a list of major belongings is more useful than no record. You can improve descriptions, add receipts, and fill gaps over time. Start with evidence that gives a clear picture of your household, protect it outside the home, and make small updates part of your normal routine today.